
Welcome!
If you have stumbled across this page, chances are you are a website administrator for a website that is run using the Amnesty WordPress theme.
First and foremost, welcome on board!
This project is all about sharing development, content and skills across the movement, which means the more the merrier!
Our happy crew of website administrators have varying levels of website experience before joining the project. Some of you will know all of the webdev lingo that out there and be familiar with the ins and outs of WordPress and how websites work.
Or maybe you come from more of a content background, and have detailed strategies prepared outlining exactly how to promote and optimise your website.
For others, this may be your first time running a website.
We hope this guide is useful for administrators of all backgrounds. If anything in this guide is unclear or you can’t find the answer to your question, feel free to get in touch with the International Secretariat website operations team.
What is the website administrator responsible for?
- User management
- Homepage updates
- Website content strategy
- Training users (with help from the International Secretariat website operations team if you need it)
- Main point of contact for website queries from your team (don’t worry, you can escalate things up to the International Secretariat website operations if you don’t know the answer!)
- Making sure your website is GDPR compliant
- Making sure your website is compliant with other local regulations, for example, meeting accessibility standards
- Keep up-to-date with new releases and updates to the theme and check to make sure that they don’t have any knock-on effects on your site.
Website Administrators Code of Conduct
Website administrators have access to more settings and permissions than the standard CMS user. For this reason, it is important that we are all familiar with the Website Administrators Code of Conduct.
If your site is running on infrastructure that is managed by the IS Digital Operations team, you will need to confirm that you have read and agree to these rules before we change your user permissions.
1. Make sure that all users have set up Multi-Factor Authentication.
You can read more about how this works here.
2. Do not create user accounts for team or shared mailboxes.
It is important that users on your site do not share accounts or passwords when accessing the CMS. This is an important part of keeping your website secure.
3. Regularly audit user lists
Make a regular habit of reviewing the list of users who can access your account and delete any if colleagues have left Amnesty and no longer need to use the CMS.
4. Make sure your website is always GDPR compliant.
You can find out more about the General Data Protection Regulation (GDPR) here. GDPR is a European regulation that is designed to protect people’s privacy and security online. It also applies to websites and organisations that are based outside of Europe, so its something that we all need to be familiar with as website administrators.
Most Amnesty sections should have an appointed GDPR Information Officer. As a website administrator, you should know who this person is and keep them informed on any projects or work that involves personally identifiable information.
5. Do not set up a multisite without checking in with the Website Operations team.
We can help you set up your multi-lingual or multi-purpose site and make sure that it does not have knock on effects on your existing content.
6. Do not enable comments without checking with the Website Operations team.
We are happy to help you find the best solution for enabling comments on your site. However, it is important to note that most comment functionality collects personally identifiable information which means that turning them on could make your site compliant with GDPR.
7. Do not enable plug ins without checking with the Website Operations team.
There are a collection of plugins that we have reviewed and recommend using along with Amnesty’s WordPress Theme.
Some of these are designed specifically for our theme and others are owned and managed by other companies. Get in touch with the Digital Operations team if you have any questions or would like to request a new plugin.
User Management
User management is super important to making sure your site is secure and ensuring that all of your users can create, edit and publish content with the right permissions. As mentioned in the Website Administrators Code of Conduct, user lists should be frequently audited to make sure that anyone who has left the organisation cannot log into the system.
As an administrator, you can see the full list of users on your site, what level permissions each person has, how many posts they’ve published and whether or not they have Two-Factor-Authentication enabled for their account.
Adding new users
You can add new users by going to the User tab and selecting Add New. In most cases, you will be adding users who don’t already have WordPress Logins, so you’ll need to use the Add New User section of this page.
Remember that you should not be creating accounts for team addresses or shared mailboxes. Each account should only be used by one person.
Enter their username, which should only include letters and numbers (no spaces or special characters) and their email address. Select the type of user permissions you would like for this new user. We’ll go into the differences between these different user types in a bit.
Once you’ve done this, the user will get an email that will have a link which they will need to open to finish setting up their account. They may need to check their Junk mailbox if they don’t immediately receive the email. If they are a new user, they will be brought to a page that has a temporary password. They will need to copy this password and then go to the log in screen (yourdomain.org/wp-admin).
Once they’ve logged in, they’ll probably want to change their password to something they can more easily remember.
They can do this by clicking on their username in the top right-hand side of the CMS (again, left-hand side if you are using RTL settings!) Tell them to scroll down to the Account Management where they can enter a new secure password.
To finish setting up their account, they will need to enable Two-Factor-Authentication

Helping users set up Two-Factor-Authentication (2FA)
2FA is a crucial part of keeping your website secure. We recommend that when you initially create accounts for new users, you should only give them Subscriber access and wait for them to set up 2FA before elevating their permissions (always good to give people an incentive…:p)
The first step to setting up 2FA is to download Google Authentication on your phone. This app can be found on both Google Play and the Apple App Store.
Once the app is installed, instruct them to click on the plus icon at the bottom of the screen and then select “Scan QR code”.
Now back to the CMS. Users can finish setting up 2FA by going to the Two-Factor-Auth tab in the CMS.
They can use their phone to scan the QR code on this page so that your site is listed in their app. The temporary code that shows up in the app should match the one that shows up on the screen. Once this has been checked, they can select the “Enabled” box and “Save Changes.”
Once 2FA is set up, the user will need to enter the 6 digit code on their phone every time they log in. This code will change every minute.

Administrator Settings
As a website administrator, you have access to a lot of different settings and options that other CMS users can’t see. Most of these settings don’t need to be changed very often, if at all, and are generally most helpful when you are setting up your site for the first time.
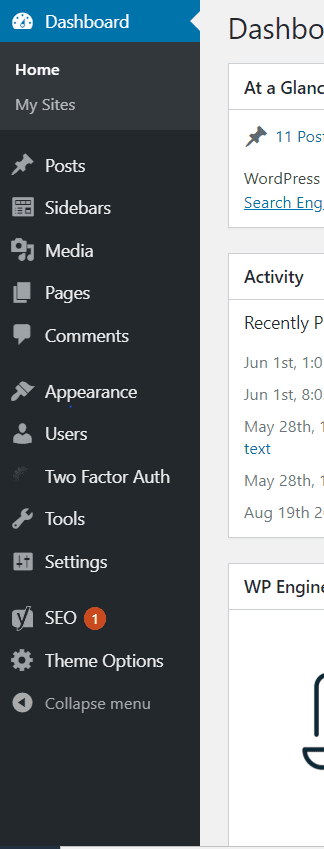
Once you become an administrator, you will be able to change some of the options in the Appearance, Users, Settings, Yoast SEO and Theme Options tabs.
Editor View:

Administrator View:
Updating and creating menus
You can update and create your menus in the Appearance settings section of the CMS.
Select the menu that you would like to edit, using the Menu Name dropdown bar.
By default, you will have a Main Menu, Footer Legal, Footer Main and Site Selector built into your site.
You can also create additional menus that can be used with the Menu block.
It’s important to remember that your audiences will be accessing your site from various devices, which means you should try to keep your menus small and keep your menu item names short.
You can add pages, posts, categories and custom URLs to your Menu.
As a general principle, it is better to only include links to pages on your site to your menus. It can be a complicated user experience to click on a menu item and be redirected to another website and it means that users will spend less time on your site.
You can add child menu items underneath parent menu items so that when you hover over a menu, you can reveal a drop-down submenu.


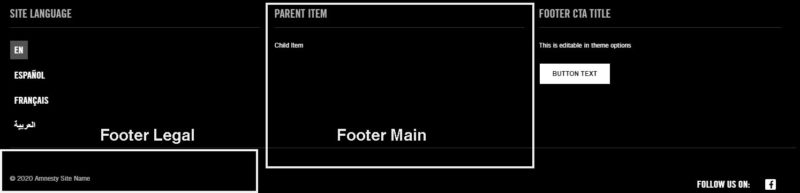
Important note for Footer Menu
The parent menu items in the footer menu will not look like a link in the footer (although it will still work like one.) We recommend that you use these as titles for the different sub-menus in your Footer. For example, if you want to have a list of your social media accounts in your footer menu, you would add “Follow Us” as the parent menu Item and “Facebook”, “Twitter”, and “Instagram” as child items.

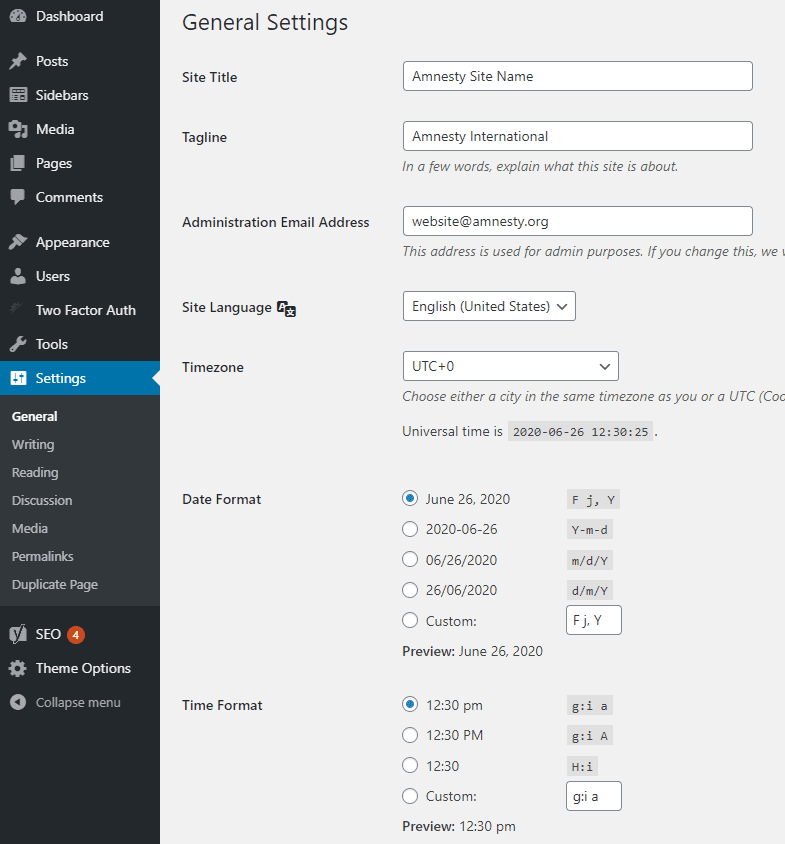
Changing Site Title and Site Tagline
Your site title and site tagline are important parts of your site identity. They are key to helping search engines figure out what your site is for and how to list it in search engine result pages.

The site title can also be seen in the tab in your browser.

You can change your Site Title and Tagline in the Appearance tab by going to the Customize section and then to Site Identity. Don’t forget to publish your changes!

Change site language, timezone, date format or time format
You can change some of the general website settings such as site language, timezone, date format or time format from the Settings tab.
Selecting the correct site language is an important factor in search engine optimization, so double check this setting to make sure it matches your content. If you are using the multi-site function to have multiple language versions of your content, you will need to go into the site settings for each language site and change the language.
The timezone that you use will impact the timestamp that appears on your Posts and will also be the timezone that is used when you schedule your content to publish at a specific time in the future
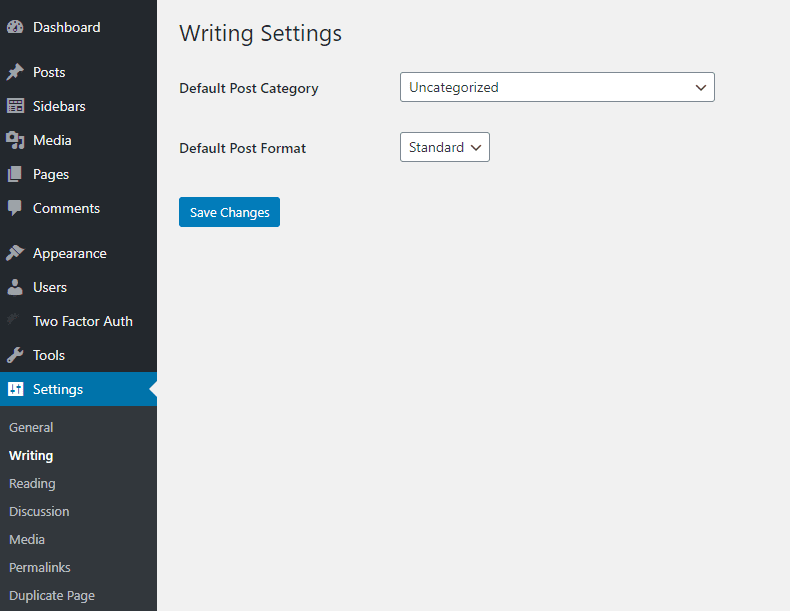
Change default Post Category
When a new post is created, it will be categorized as “Uncategorized” by default. If you would like to change this to something else, you can select a different Default Post Category in the “Writing” section of the Settings tab.
Discourage search engines from indexing your site
If you don’t want your website to be indexed by search engines, you can select the “Search Engine Visibility” checkbox in the “Reading” section of the “Settings” tab.

URL structure for Posts
All of your posts will follow the same URL pattern which can be built in the “Permalinks” section under the “Settings” tab. Permalinks are very important for search engine optimisation as they give search engines an indication of how different content relates to other content.
For instance, if you want to optimise your content for Google News, you will need to have a date structure in the URL for your news content.
You can also incorporate categories into your permalink structure. For instance, if you select “News” as your primary category the URL of the post will be domain.org/news/post-name.
Keep in mind that your URLs should not be too long.
The URL structure that you decide to use should not change after your site goes live. Doing this will remove any search authority that your posts have already generated.
If you have questions about the most strategic way to set up your permalinks, please contact us at [email protected]
Yoast SEO settings
Administrators also have access to Yoast SEO tab.
If you go to the General settings section of the Yoast SEO tab, you can see a dashboard that will show you any problems or notifications relating to search engine optimisation on your site. For instance, if your site is blocked from search engine crawls, you will be notified here.
You can add your Google verification code (which you can find using Google Search Engine Console) by clicking on the Webmaster Tools

You can add links to various social media platforms in the Yoast Social settings. This is important in making sure that your social media accounts are associated with your website in the Google Knowledge Graph. That way, when people search for your website, those accounts will be listed in the Knowledge panel.

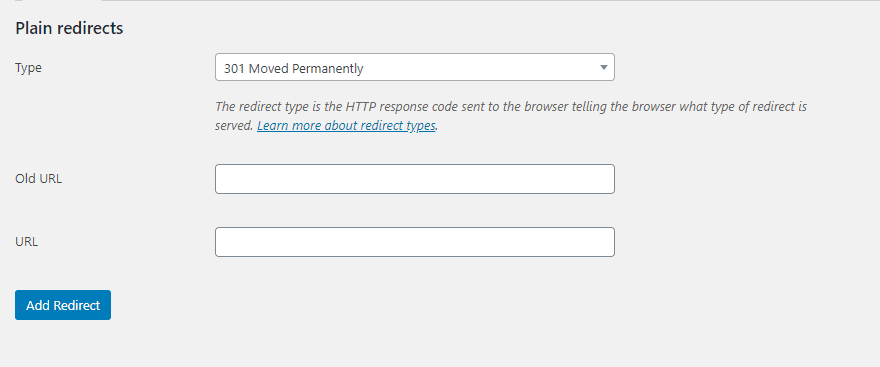
Redirects
Both website administrators and editors can access the redirects section of the CMS, but it is extra useful for administrators who will probably be asked to “fix” broken links and be working on improving SEO across the site.
More information on using the Yoast SEO plug in and SEO more generally will be available in our SEO guide.
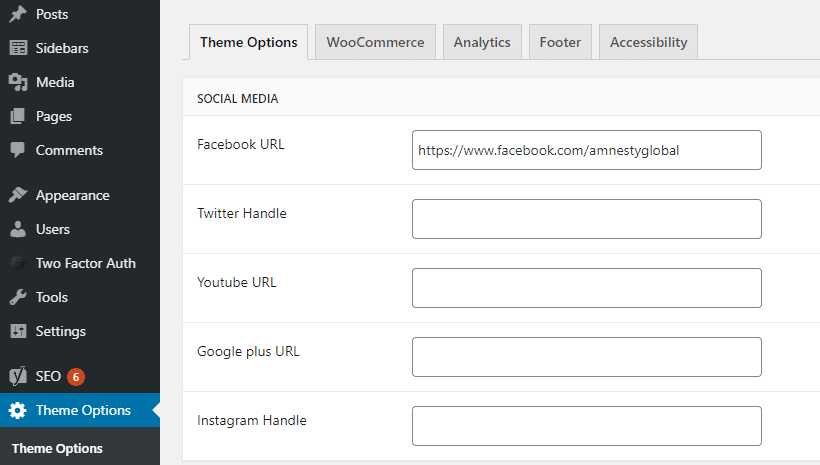
Adding social media links
There are various places in the CMS where you will probably want to add links to your social media accounts. You may have them featured in a menu or have them listed in your Yoast settings (more information on that in the section of the guide above this one!)
However the social media link settings that impact your site the most are in the Theme Options.
Adding/changing the logo, colour and call to action (CTA) in your main menu
You can change your logo, logomark and the colour and call to action in your menu in the Theme Options tab.

The Logo is found in the top left-hand corner of every page and your CTA is in the top right hand side (unless your website is RTL instead of LTR in which case it will be swapped!)
When selecting an image to use for your logo, make sure you check to see how it looks once you add it. Adding an image that is too tall will make your menu look a bit glitchy.
Same goes for the text in your CTA button. You don’t want it to be too long.

The logomark is the icon that shows up in the tab of your browser.

Don’t forget that you can change the rest of your menu by going to the Menu section of the Appearance tab. More information on that in this guide if you scroll up a bit.
Default side bar
If you use a Standard Post template to create a new page, the default sidebar will be used to fill the sidebar section of the page.
You can set your default sidebar in the “Theme Options” section of the CMS (keep scrolling down past the social media and header settings!)
Users can go in manually and select different sidebars that are more specific to their content.
We recommend that you use a generic “Join Amnesty” or “Donate” sidebar as your Default side bar.
You can learn more about sidebars here

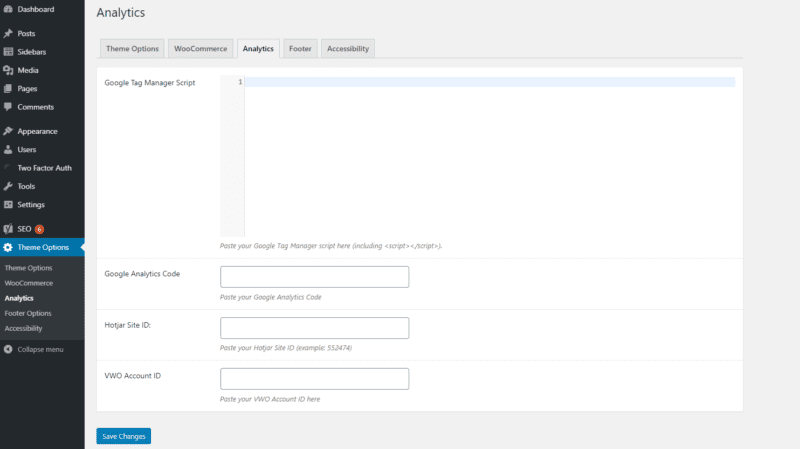
Google Analytics, VWO, and Hotjar IDs
If you are using tracking tools such as Google Analytics, VWO or Hotjar, you will need to link them up to your site in the Analytics section of the “Theme Options” section of the CMS.
Each of those tools will generate IDs or scripts for you and all you need to do to link them to your site is paste in the IDs/scripts here.
Call to Action in the Footer
Most of the content in your footer can be changed in the Footer Menu when you go through the Appearance section of the CMS (more information on that in the menu section of this guide.) However, you need to go to the “Footer Options” section of the “Theme Options.”
You can change the Title, Section Content, Button Text and link here.
