The website header has two popular menus, the Site Selector and the Main Menu. You can assign a menu to the location in the theme using the “manage Locations” tab in “appearance” > “Menu”.
/wp-admin/nav-menus.php?action=locations

Site Selector

The Site Selector can be used for linking to other amnesty websites, for displaying the name of the website or can be replaced with language options if using Multi Lingual Press.
You can edit this in /wp-admin/nav-menus.php
If you are using Multi Lingual Press this can be replaced with the MLP menu and can be set in the network options which requires network admin access.
/wp-admin/network/admin.php?page=amnesty_network_options

The Multi Lingual Press language name can be overridden in “Settings” > “General”
/wp-admin/options-general.php

Main Menu
The Main Menu has the ability to add child menu items.
The menu can be edited here /wp-admin/nav-menus.php
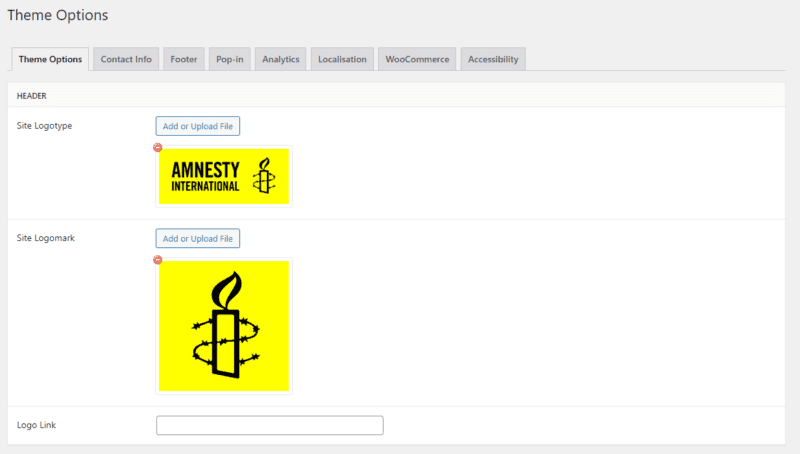
Global Header Options
The global options for the whole theme can be set in the theme options page, you can choose the menu logo and a link for the logo.
/wp-admin/admin.php?page=amnesty_theme_options_page

Logo
The logo and logo mark can also be set. For best results upload a logo 720 by 200px.

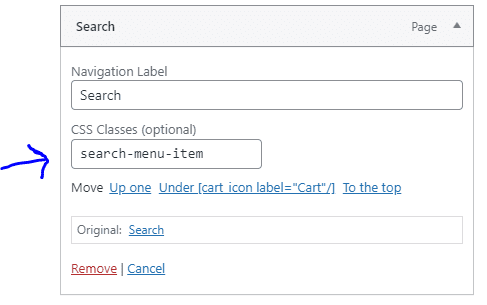
Custom CSS Classes on Menu Items

You can set a custom CSS class by going to Appearance > Menus > Choose the page you want to apply the class to > Add in ‘CSS Classes’ field: donate-now-menu-item.
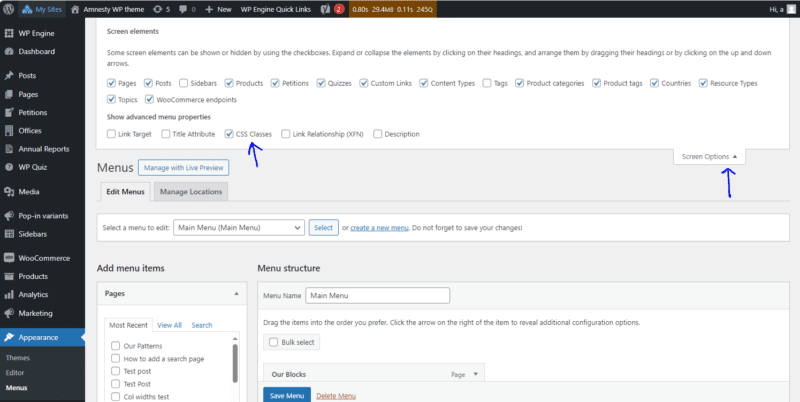
The search page can show a search icon in the menu by adding the following CSS Class.
search-menu-item
The donate page can show a yellow background by adding the following CSS class
donate-menu-item

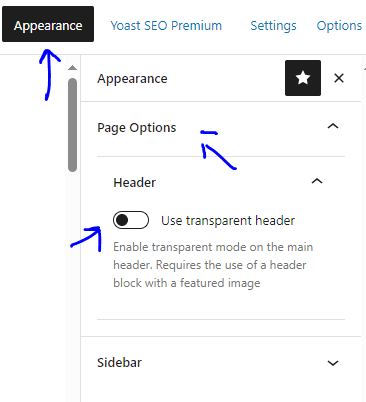
Transparent Menu
When editing a page the menu can be set to transparent if a hero block has been added with a featured image.